Windows Client Configuration with Machine Certificates
-
Open the Network & internet settings
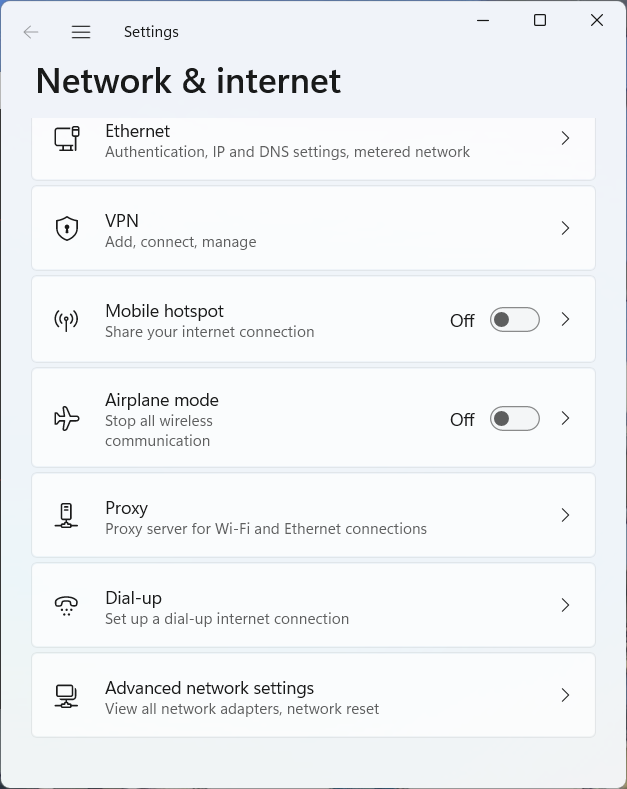
Select VPN.
-
The Network & internet > VPN menu opens.
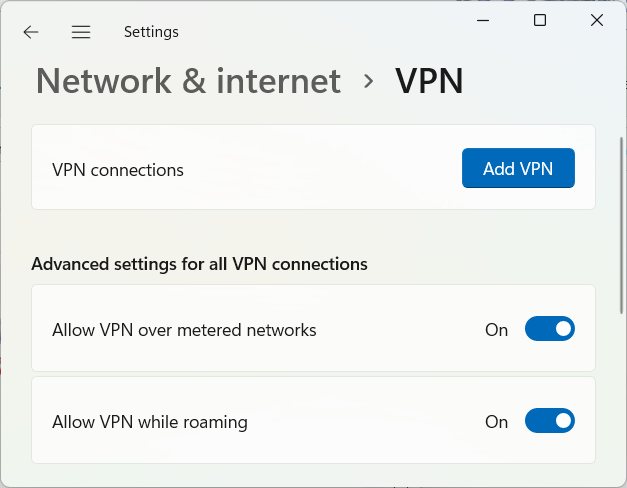
Click on Add VPN.
-
The Add a VPN connection menu pops up.
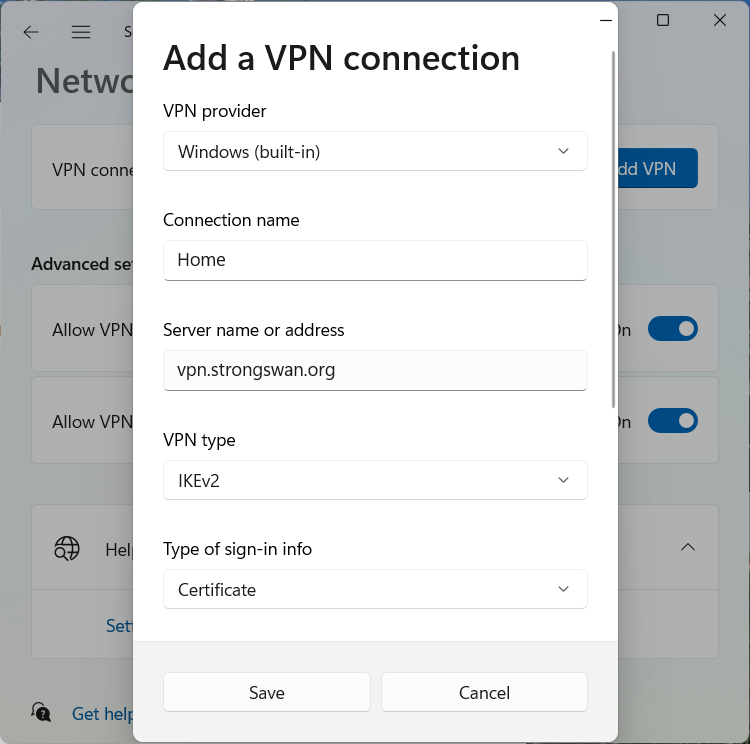
Fill in the following fields:
- VPN provider
-
Select Windows (built-in).
- Connection name
-
Choose a name for your VPN connection.
- Server name or address
-
Give the fully qualified hostname of the VPN gateway. The hostname must be contained as a
subjectAltNamein the gateway certificate. - VPN type
-
Select IKEv2.
- Type of sign-in info
-
Select Certificate.
Click on Save.
-
The Home connection has been added to the Network & internet > VPN menu.
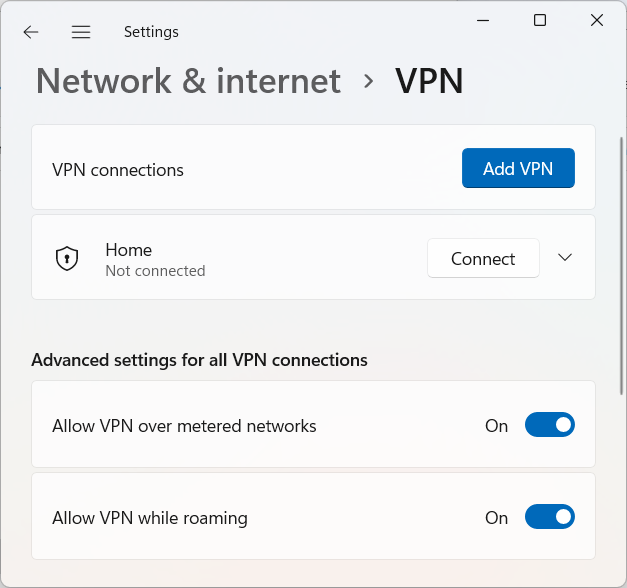
We aren’t finished yet. The Home connection has been configured by default with EAP-TLS and user certificates so that we have to switch to machine certificates next.
-
Open the Network & internet settings again

Select Advanced network settings.
-
The Advanced network settings menu opens
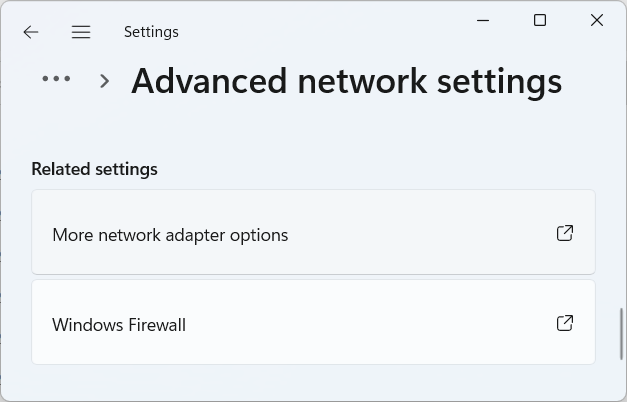
Select More network adapter options.
-
The Network Connections overview has been opened show all network adapters.
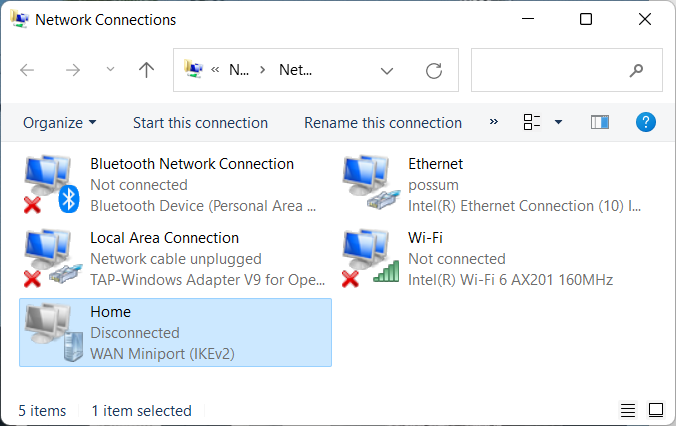
Right-click on the Home WAN Miniport (IKEv2) adapter and select Properties.
-
The Home Properties menu pops up.
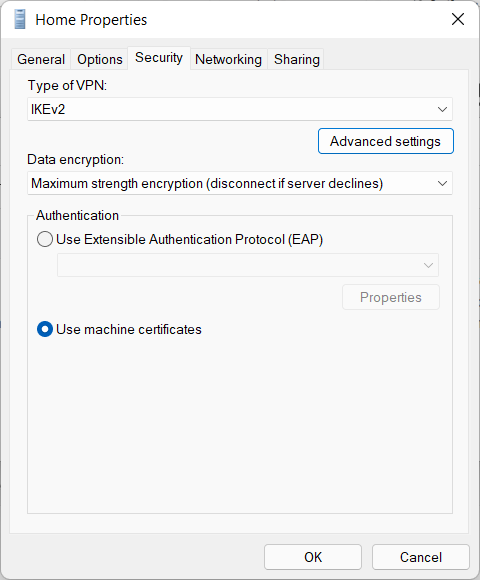
Switch to the Security tab and select Use machine certificates. Additionally change the Data encryption field to Maximum strength encryption. Then click OK. This eliminates the weak single
DESand the fatalNULLencryption in the ESP proposal of the Windows client.esp = aes256-3des-sha1
The Windows Home VPN connection based on machine certificates has now been successfully completed.